
 English
 German
  Italian
  Hi, User
 What Are Fresh Supply and Demand Zones and Why They Matter
Ever entered a trade at what looked like a perfect support or resistance level, only to watch price slice through it like it wasn’t even there? You’re not alone. Thousands of forex traders make this costly mistake every day. They treat all supply and demand zones as equal when, in fact, they are not.
Here’s the truth: A supply or demand zone that’s been tested multiple times is like a worn-out shield; it gets weaker with each hit. But a fresh zone? That’s an untested, pristine level where institutional orders are still awaiting fulfillment.

In this guide, I’m going to break down exactly what fresh supply and demand zones are, why they matter, and how to spot them on your charts. By the end, you’ll understand why experienced traders prioritize fresh zones and have a clear strategy for trading them confidently.
What Exactly Is a Fresh Supply or Demand Zone?
A fresh supply or demand zone is a price level where institutional traders placed significant orders, but price hasn’t returned to test that level yet. Think of it as a loaded spring that hasn’t been released.
Fresh Supply Zone: A price area where sellers previously pushed price down aggressively, and price hasn’t returned to that level since. The selling pressure from institutions is still sitting there, waiting.
Fresh Demand Zone: A price area where buyers previously pushed price up aggressively, and price hasn’t returned to that level since. The buying pressure from institutions is still there, unfilled.

The keyword is “fresh,” meaning untested since its creation. Once price tests a zone, it’s no longer fresh and carries significantly less weight in your trading decisions.
Why Does “Fresh” Matter?
When institutions place large orders, they can’t fill them all at once without moving the market dramatically. So they leave resting orders at specific price levels. A fresh zone indicates those orders are likely still there, untouched, and ready to defend that level when tested. A zone that’s been hit multiple times? Those orders have probably been filled already, making the zone far less reliable.
How to Identify Fresh Supply and Demand Zones
Follow this step-by-step process:
Step 1: Look for Strong Impulse Moves
Fresh zones are created by aggressive price movements, sharp moves away from a price level with strong momentum candles, and a clear consolidation area before the explosive move.

Step 2: Identify the Zone Base
The actual zone is the last consolidation or base before the strong impulse move. For a demand zone, look at the last consolidation before a strong bullish move. For a supply zone, look at the last consolidation before a strong bearish move.
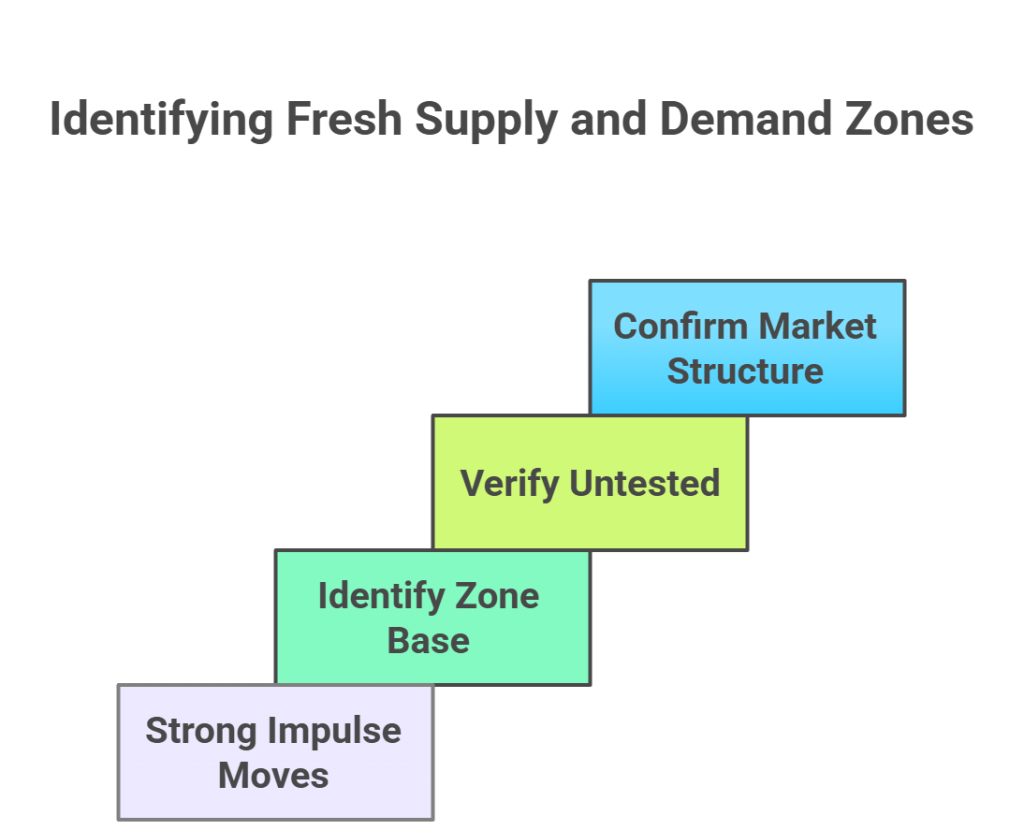
Step 3: Verify It’s Untested
Trace the price action forward from when the zone was created. Has price returned to this level? If yes, it’s no longer fresh. If no, you’ve got a fresh zone worth watching.
Step 4: Confirm with Market Structure
Fresh zones become even more powerful when they align with Break of Structure (BOS) points, dominant trend changes, or near significant inefficiencies like fair value gaps.
Trading Fresh Zones: Practical Strategy
Entry Techniques:

- Aggressive Entry: Enter as price touches the fresh zone for best risk-to-reward
- Conservative Entry: Wait for confirmation like an engulfing candle or rejection wick
- Layered Entry: Split your position between aggressive and conservative entries
Stop Loss Placement:
Place stops 5-10 pips beyond the zone. For demand zones, stops go below the zone’s lowest point. For supply zones, stops go above the zone’s highest point.
Take Profit Strategies:
Target the next fresh zone in the opposite direction, or use a fixed risk-reward ratio of at least 1:2 (preferably 1:3 or higher). You can also target the nearest inefficiency or fair value gap.
Risk Management:
- Never risk more than 1-2% per trade
- Higher timeframe zones (4H, Daily) carry more weight
- The first test of a fresh zone offers the highest probability
- Always consider the dominant trend direction
Common Mistakes to Avoid
Mistake 1: Trading Every Zone Without Context
Not all fresh zones are equal. A fresh demand zone in a strong downtrend is fighting against momentum. Prioritize zones that align with the dominant trend or occur at major structure breaks.
Mistake 2: Being Too Rigid on Entry
Price doesn’t always touch the exact zone boundary. Use a zone range with 10-20 pip flexibility on higher timeframes.
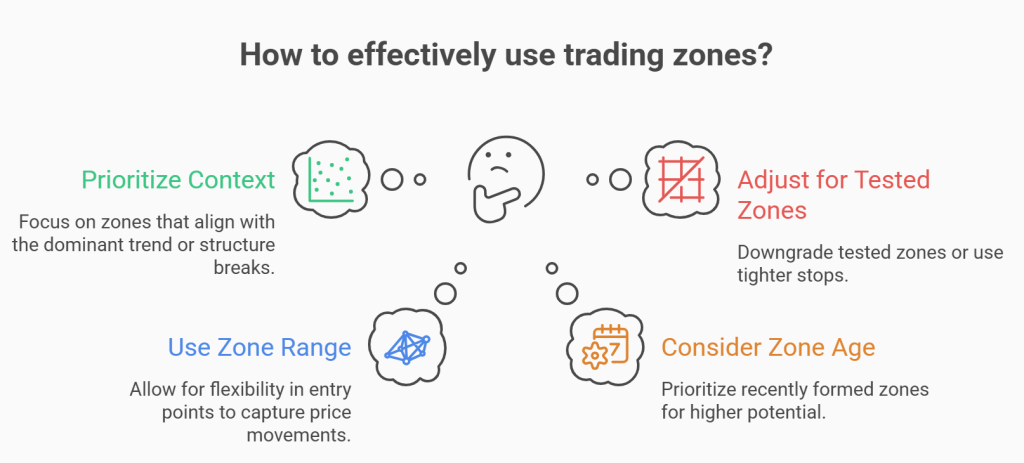
Mistake 3: Ignoring Zone Age
A zone created yesterday is fresher than one created three months ago. Prioritize recently formed zones (within 2-4 weeks on daily charts).
Mistake 4: Trading Tested Zones Like Fresh Zones
Once price tests a zone, it’s no longer fresh. Downgrade tested zones in your analysis or use tighter stops and smaller position sizes.
How Fresh Zones Connect to Other Concepts
Fresh zones work best when combined with other price action elements:
- Market Structure: Fresh zones at BOS points offer the highest-probability setups
- Imbalance Zones: Fresh zones near fair value gaps create powerful confluence
- Engulfing Candles: Watch for engulfing patterns when price tests fresh zones for entry confirmation
- Dominant Trend: Always trade fresh zones that align with the overall trend direction
Conclusion
Fresh supply and demand zones show you where institutional money is positioned and waiting. They give you the opportunity to trade alongside the market’s biggest players rather than against them.
Key Takeaways:
- Fresh zones are untested levels where institutional orders likely remain
- The first test offers the highest probability of a reaction
- Fresh zones work best when aligned with market structure, trends, and inefficiencies
- Context matters; not all fresh zones are equal
- Once tested, a zone loses its “fresh” status and reliability
Action Steps:
- Identify 3-5 fresh zones on your charts that align with the current trend
- Set price alerts for those zones
- Practice identifying fresh zones on historical price action
- Start with higher timeframes (daily/4H) until consistently profitable
- Journal every fresh zone trade to track what works
Master fresh supply and demand zones, and you’ll have a powerful edge that most retail traders completely miss. Start small, stay disciplined, and let the zones do the heavy lifting in your analysis.
Post a Reply
You must be logged in to post a comment.